After install
Open onboarding.
Onboarding opens at http://localhost:3100/onboarding. Choose Online, Local AI, Claude account OAuth where supported, or Codex sign-in for optional coding delegation.
Install Disp8ch on Windows, Linux, macOS, or WSL, then choose a hosted provider or local model runtime during onboarding.
The installer sets up a managed Node runtime when needed, installs dependencies, initializes a clean workspace, starts the app at http://localhost:3100, and opens onboarding.
curl -fsSL https://raw.githubusercontent.com/aaronnat23/disp8ch/main/scripts/install.sh | bash -s -- --repo https://github.com/aaronnat23/disp8ch.git
$env:DISP8CH_SOURCE_ZIP_URL = "https://github.com/aaronnat23/disp8ch/archive/refs/heads/main.zip"; iex (irm "https://raw.githubusercontent.com/aaronnat23/disp8ch/main/scripts/install-windows.ps1")
Onboarding opens at http://localhost:3100/onboarding. Choose Online, Local AI, Claude account OAuth where supported, or Codex sign-in for optional coding delegation.
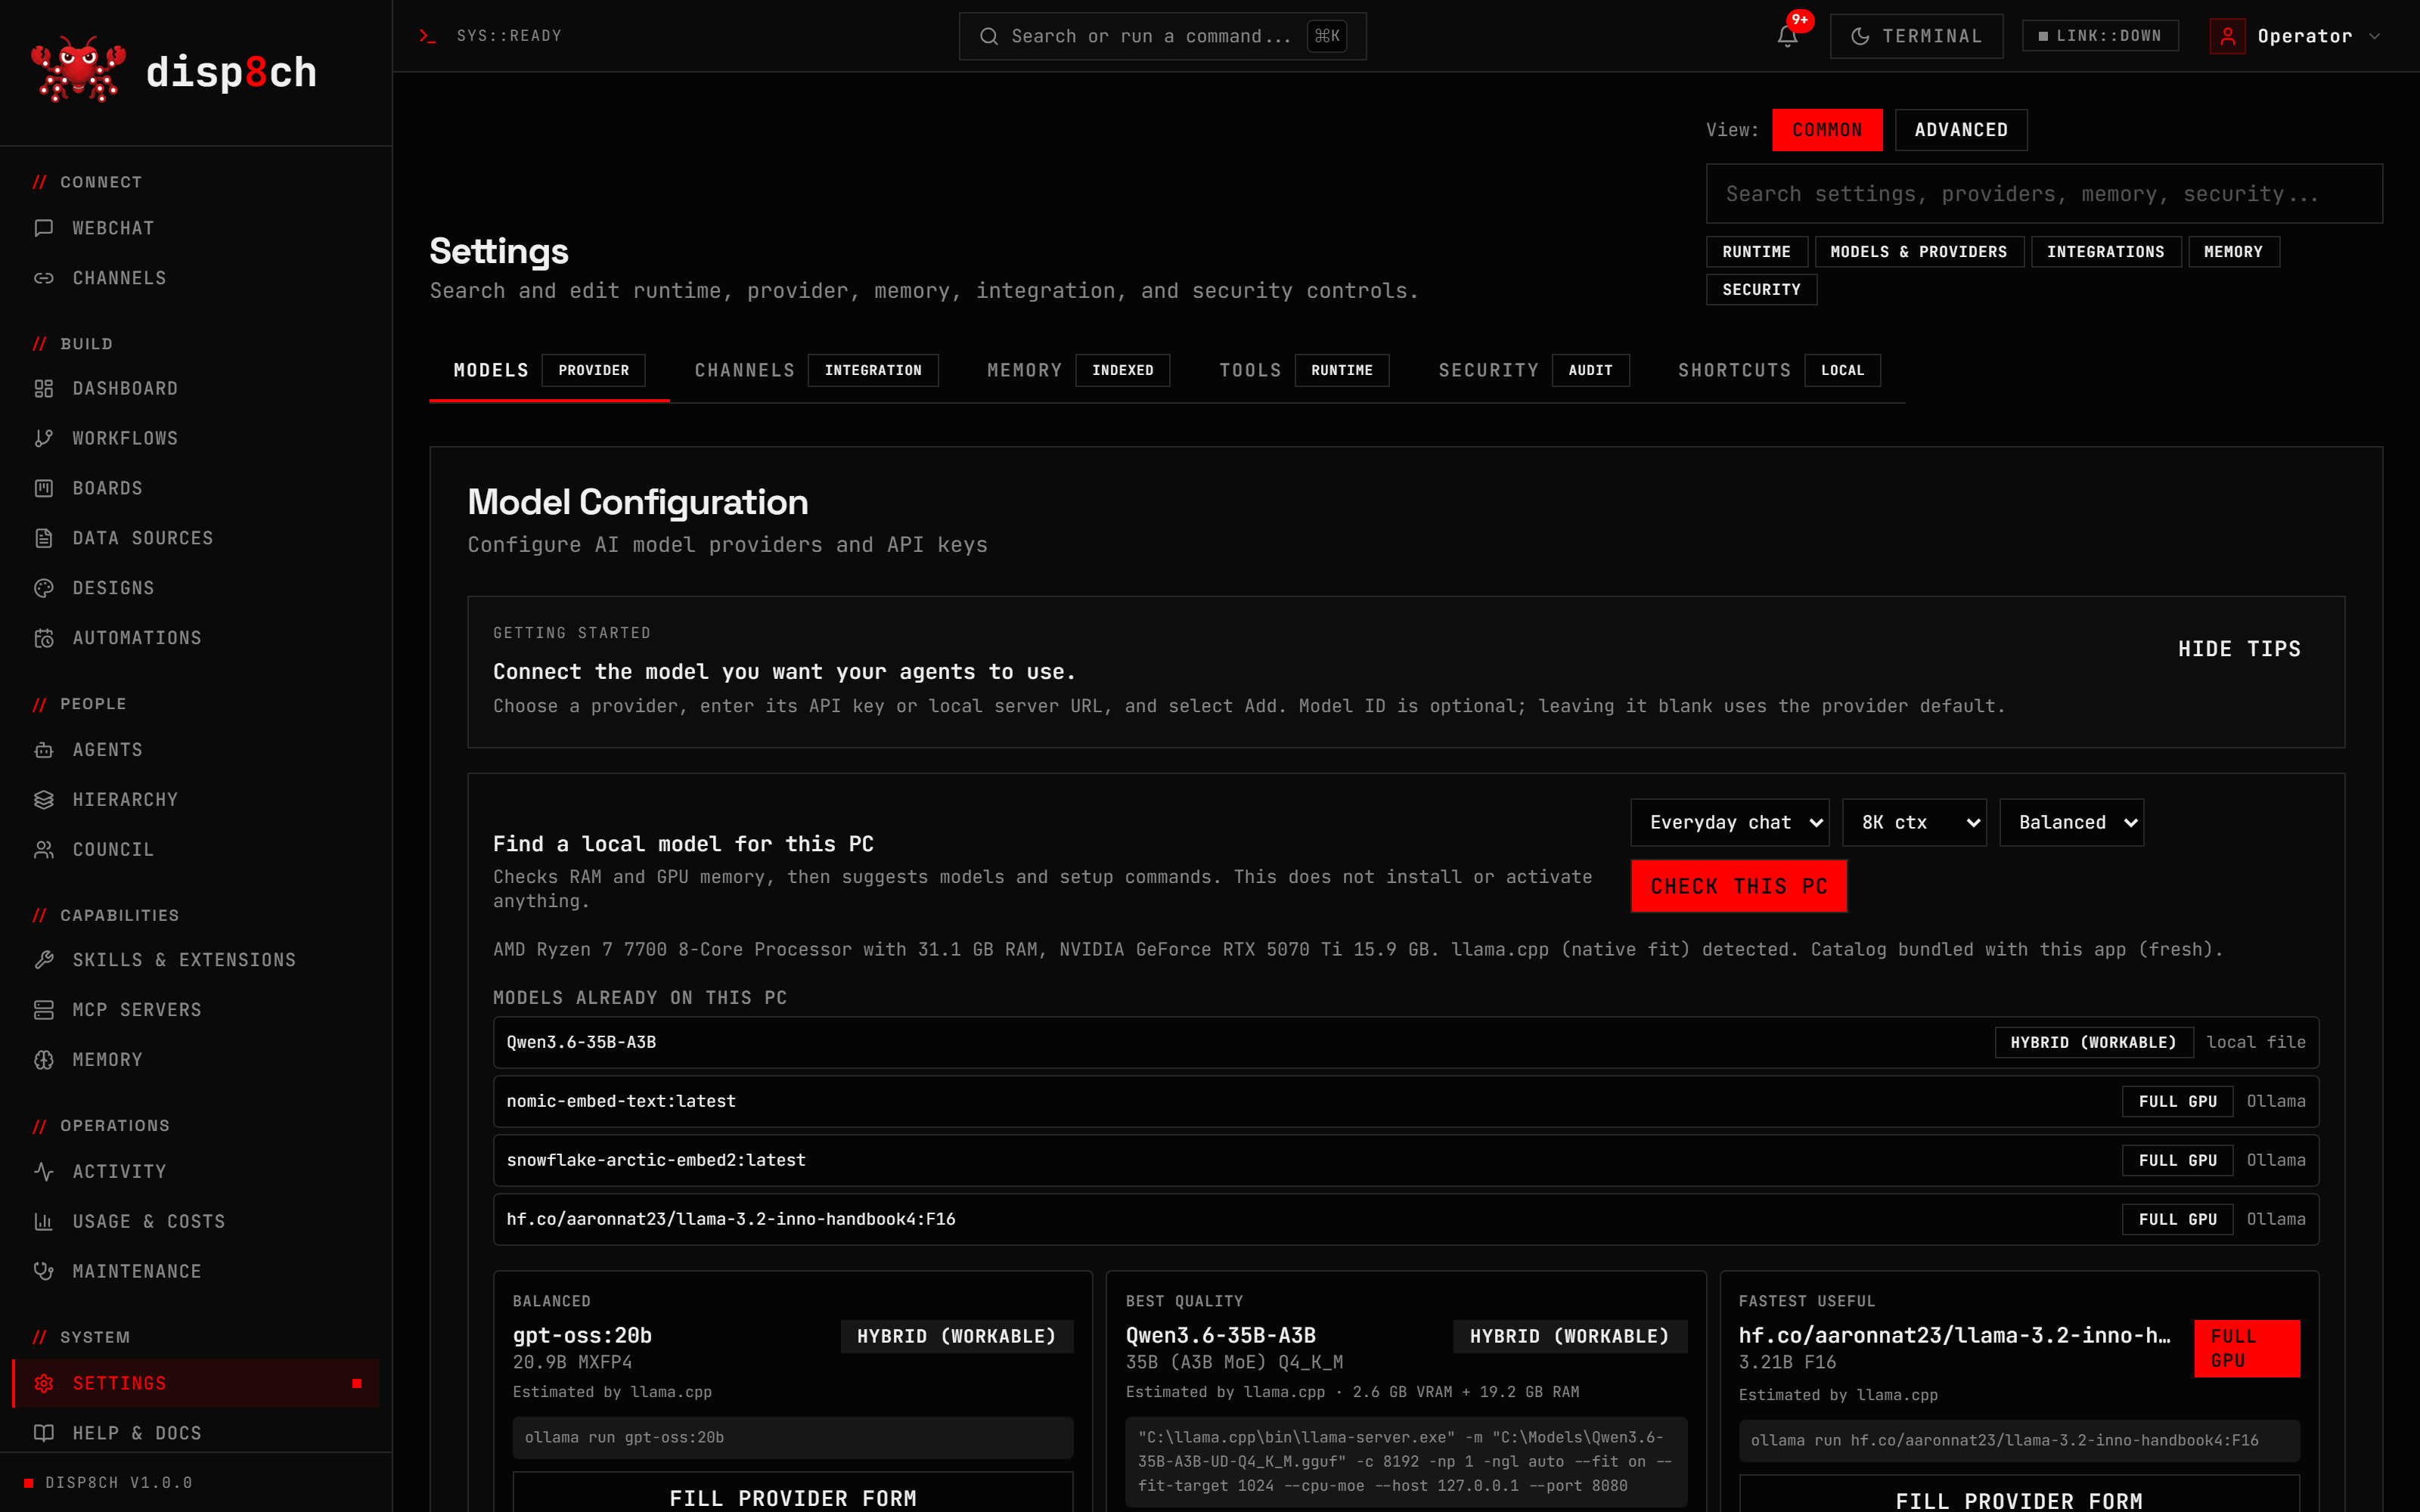
Run Ollama, LM Studio, llama.cpp, vLLM, SGLang, or another OpenAI-compatible local server and point Disp8ch at the base URL.
Use environment variables or the app secret store. Do not commit .env.local, OAuth token files, auth JSON, local credential folders, or generated runtime state.
corepack enable
corepack pnpm install
corepack pnpm dpc init --ensure-env
corepack pnpm dev
For a cloned checkout you can also run node install.js. Windows users can run powershell -ExecutionPolicy Bypass -File .\install.ps1.